Fingernail & Toenail Fungus Best Practices Guide

Choosing the Most Effective Formula
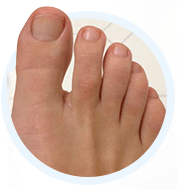
This simple guide is the combined effort of years worth of research and experience regarding best practices for helping to alleviate discoloration and the regrowth of fungal nails. Before we begin this guide, we need to clear up a few preconceived notions you may have. Despite some common misconceptions, it is not realistic to deal with Nail Fungus (Onychomycosis) overnight, even with prescription medication or laser therapies, you can expect an average turnaround time of 2-6 months to completely regrow new nails that are fungal free. This is due to the time it takes to regrow a healthy new nail, fungus severity and type, and variables that effect the regrowth.
However, if you are serious then the following information presented here will provide helpful insight, realistic expectations and help to avoid common mistakes and potential setbacks.
Nail fungus is not considered a serious health condition and can often be addressed at home with an over-the-counter option with the right ingredients. Any resolution will take time, consistency and patience.
The best course of action is prevention, but this guide will assume that you area already dealing with nail fungus. When we reference the FDA’s approved anti fungal ingredients in this guide we are making reference to their monograph (link 1) for using ingredients as anti fungals and at the permitted levels and concentrations. Not all products contain anti fungal ingredients as an active ingredient or even at all as determined by the monograph link 1. Throughout this guide you will evaluate different options using an recommended option of your choosing.
Dealing with nail fungus is a difficult and time consuming process. There are no short cuts, follow the information in this guide closely and we are confident you may improve your chances of a positive outcome by avoiding some common mistakes and setbacks.
Be Proactive and Take Action
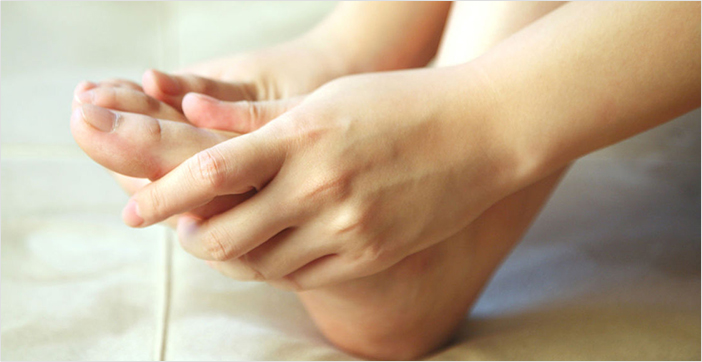
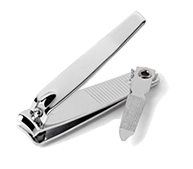
It is extremely important to keep all your nail care tools sanitized. Start by disinfecting your nail clippers, nail file, and any other nail care utensils you are using with rubbing alcohol and then dry thoroughly. You will want to sanitize your utensils between use when working on infected nails. Do not share your nail care utensils with others. Trim your nails carefully to remove any excess infected nail. It’s important to keep your nails trimmed and short but not to the point of discomfort. This serves two purposes: 1. Removes excess nail that is infected 2. Easier to apply topical solution to ridges, sides and underneath the nail. Once nails are clipped, file nails gently along ridges, cuticle and top of the nail. Your nails are now prepped. Remember to discard/disinfect your utensils immediately afterward.
Time Requirement:
As mentioned, you will not realistically see immediate results so it is important to remain patient and stick with your program every day. Over time, newer healthy nail should start growing in place of the infected nail from the base, as natural regrowth occurs remember to regularly clip away the infected nail per normal. The severity of nail fungus, your nail care product, consistency & discipline in daily applications all play an important role in your nail care regiment. Nail fungus didn’t occur overnight and immediate results will not either. Remain consistent with applications and you’ll have the best opportunity to regrow healthy nails and experience visible progress. It’s not uncommon to start seeing some visible initial improvement within a few weeks but do not expect this to be the norm. Typically, within 2-3 months you’ll begin to notice recognizable progress from the base of the nail.
Step #1 | Gather Your Materials
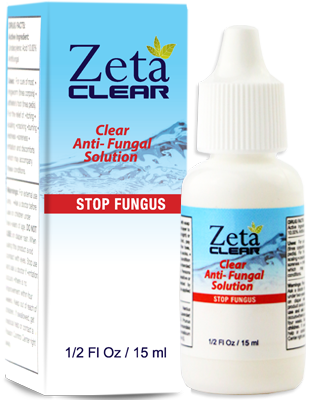
Requirements: This method requires an nail fungus product containing a recognized anti fungal ingredient listed on the monograph link 1. These ingredients include Caprylic Acid, Tolnaftate, or Miconazole nitrate.
You will need the following items:
Nail clippers for trimming off as much of the exposed infected toenail as possible.
A metal nail file is highly recommended. Cardboard nail files or emery boards cannot be properly cleaned and should be disposed of between uses. Acrylic and crystal nail files are not recommended.
Use a topical solution that contains Tolnaftate or Caprylic acid along with essential oils or compounds to help reach underneath the layers of the nail. As emphasized throughout this guide, choosing products with recognized antifungal ingredients link 1 is vital to your success throughout this entire process.
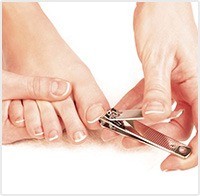
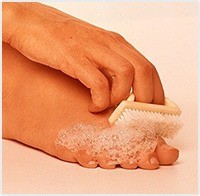
Step #2 | Cut and Trim Your Toenails
Trim your nails carefully to remove any excess infected nail. It’s important to keep your nails trimmed and short but not to the point of discomfort. This serves two purposes: 1. Remove excess infected nail 2. Easier to apply topical solution to ridges and underneath nail. Fungus lives within the layers of the toenail and the surrounding skin tissues. Cutting and filing the nails as short as possible will remove much of the fungus and promote the growth of healthy and uninfected nails.
You will need the following items:
Trim your toenails as short as possible without cutting them down to the point of pain or discomfort.
Gently file the sides, top, and front portion of the toenail to remove some of the infected layers of the nail. This is a critical step in allowing topical solutions to more easily penetrate deep within the bed of the nail.
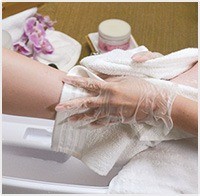
Step #3 | Soak, Cleanse and Scrub Nails
Submerge finger or toenails in warm soapy water for two minutes. This will help loosen dirt particles underneath your nails, the skin around the nail ridges as well as your cuticle. Wash your hands normally or use a nail brush to reach underneath nails to the best of your ability. It is important to clean this tool after each use along with your other nail care utensils. Wash thoroughly but not to the point of discomfort. Some infected nails may be more sensitive than others, especially if any swelling has occurred.
In addition to washing your hands in this guide try to wash your hands frequently throughout the day as needed – using warm water and soap to thoroughly lather or try hand sanitizer.
Step #4 | Thoroughly Dry the Affected Areas of the Feet
Thoroughly dry your nails prior to applying topical nail solution. Some people prefer to use a blow dryer to help remove excess moisture but this is not necessary. Once your nails are completely dry, read the instructions on the topical anti fungal of your choice.
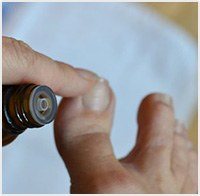
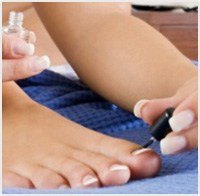
Step #5 | Apply Topical Solution to Nails
This guide assumes a topical anti fungal using 1% Tolnaftate and dropper bottle tip for application. We prefer a bottle dropper tip because it allows you to apply the solution directly to the nail without having to reinsert an applicator brush back into the formula prior to each stroke and risk contaminating or diluting the strength of the a ingredients. Apply 1-2 drops to the affected area and rub evenly around nail plate, ridges, and underneath the tip of the nail until an even coat is administered. Allow time to dry. Time to dry may vary depending on the size of nail, number of drops, type of application, and humidity. Even with all of these factors taken into consideration, 3-5 minutes is generally sufficient but refer to your topical solution instructions per label. Allow enough time to absorb before putting on socks or any attire that may make direct contact on the nails. Dressing too soon after applying may absorb the solution into that garment of clothing.
An applicator brush top has its pros and cons. Brush inward, towards the cuticle of your nail to distribute evenly across the nail plate. One criticism of applicator brushes is that between uses the sullied brush is reinserted into the solution. Overtime, it is said this could lead to diluting the formula and its effectiveness. We are unaware of any research substantiating this claim. We recommend using bottles that contain a bottle drip applicator top to prevent direct contact with the nail.
Ensure to apply 2-3 drops over the nail, sides, and underneath the rides. These open vulnerable areas allow for fungus.
When applying a liberal amount it’s generally okay to make contact with the surrounding skin. If nails are cracked, brittle, or splitting proceed with caution when applying the solution to these areas and consult the instructions on your label. If any irritation or discomfort occurs we recommend discontinuing use and consulting a physician for their professional opinion. If using an applicator brush try to make contact with the bristles directly underneath the nail. If using a drop applicator, massage the solution lightly into the affected area.
Allow enough time for the solution to dry and absorb – this could vary based on the amount applied to each nail. In many cases, five minutes or less is sufficient but we recommend consulting the label instructions.
Click here for a detailed Product Comparison including user reviews, price breakdowns, guarantees, and overall scores to help you choose a topical solution. Please come back and leave your feedback to help improve the overall quality of our review.
Step #6 | Preventative Measures and Maintenance
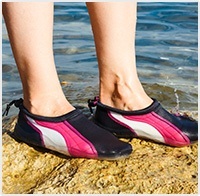
There are some nail maintenance formulas designed for warding off nail fungus but they’re not mandatory within our guide. Refer back to the prevention tips mentioned earlier and remember to rotate out any old footwear link 16 including socks. Sanitize all tools and if possible, try and identify the source of your nail fungus. Public communal areas such as locker rooms, dorms, pools are popular sources. If you don’t live in a climate where sandals are suitable or you’d prefer not to wear sandals, try a pair of ventilated mesh sneakers and rotate them out as needed. Moisture wicking socks are another alternative to help ward off nail fungus.
There are no guarantees even when taking all the tips in this guide you are always at risk of another bout. Taking these steps may help decrease the likelihood and keep your nails looking great afterward. Here are some helpful tips to keep in mind when choosing the proper footwear.Wear mesh styled sneakers or opened toe shoes whenever possible
Rotate shoes and allow them to dry thoroughly before wearing them
Change socks and inner shoe supports regularly
Avoid going barefoot in public pools, locker rooms and showers where fungal spores are known to breed.
What to Expect? Results?
You should have clear expectations regarding regrowth of healthy new nails. Average rate of nail regrowth varies from person to person. Whereas some may recover faster than others, it’s common to start seeing results around the 2-3 month mark as healthy nail regrowth occurs from the base/cuticle of the nail healthy growth occurs.
The longer you put it off, the more severe your nails may become. It’s a good idea to be proactive and take steps to avoid fungus before it’s an issue. If it’s too late, try and get an early start before it progresses.
As reiterated in this guide, it’s important to use a recognized ingredient like Tolnaftate or Caprylic Acid, you can review several of them on this website.
Reviewed and writing contributions by
Dr. Mayus Internal Medicine, Connecticut


 Loading ...